
The Ultimate Guide to Shipping & Despatch Labels: How to Print Your Own in Australia
A step-by-step guide on creating and printing your own shipping labels.
Introduction to Shipping / Despatch Labels
Shipping & Despatch labels play a crucial role in the logistics industry, serving as an identification tool for packages and ensuring smooth transportation from one location to another. Whether you are a small business owner or an individual shipping items, knowing how to print your own shipping labels in Australia can save you time and money. In this comprehensive guide, we will delve into the importance of using shipping labels, discuss the different types available, and provide you with a step-by-step guide on creating and printing your own shipping labels.
Importance of Using Shipping Labels
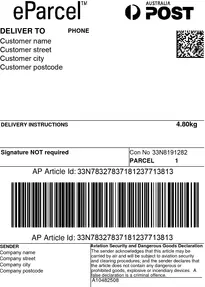
Using shipping labels is essential for several reasons. Firstly, they provide vital information about the package, such as the sender's and recipient's addresses, contact details, and any special handling instructions. This information is crucial for efficient and accurate delivery, as it enables the logistics team to identify and sort packages quickly.
Furthermore, shipping labels can also include tracking numbers, which allow both the sender and recipient to monitor the progress of the shipment. This tracking capability provides peace of mind and ensures that packages are delivered on time.
Lastly, shipping labels contribute to a professional and organised image for your business. A well-designed and properly printed shipping label not only enhances your brand's visibility, but also instills confidence in your customers, assuring them that their package is being handled with care and professionalism.
Different Types of Shipping & Despatch Labels
There are various types of shipping labels available, each catering to specific needs and requirements. Here are some commonly used shipping labels:
- Blank Shipping / Despatch Labels: These are versatile blank labels that can be customised to suit your specific shipping needs. They come in different sizes and can be printed using various printing methods.
- Integrated Labels: These labels combine a shipping label with other essential documents, such as invoices or packing slips. They are ideal for streamlining the shipping process and reducing paperwork.
- Thermal Shipping Labels: These labels are compatible with thermal printers and do not require ink or toner. They are cost-effective and produce high-quality, smudge-free prints.
- Pre-Printed Shipping Labels: As the name suggests, these labels are professionally printed with standard shipping information, such as "Fragile" or "Handle with Care." They save time and effort, but they may not be suitable if you require customisation.
How to Create a Professional Shipping & Despatch Label
Creating a shipping or despatch label may seem daunting at first, but with the right tools and guidance, it can be a straightforward process. Follow these steps to create your own shipping label:
1. Gather the necessary information: Before you start designing your shipping label, make sure you have all the required information at hand. This includes the sender's and recipient's addresses, contact details, package dimensions, weight, and any special instructions.
2. Choose a shipping label template: You can either create your own template using label design software or use pre-designed templates available online. Ensure that the template you choose is compatible with your printing method.
3. Design your shipping label: Use a clear and legible font for the text, and consider adding your logo or brand elements for a professional touch. Include all the necessary information, such as addresses, contact details, and any additional instructions.
4. Test print: Before printing a large batch of shipping labels, it is essential to do a test print. Check for any formatting errors, smudges, or alignment issues. Make any necessary adjustments before proceeding.
5. Print your shipping labels: Once you are satisfied with the test print, load your printer with the appropriate label stock and print the desired quantity of shipping labels. Ensure that your printer settings are optimised for label printing.
6. Attach the shipping label: Carefully peel off the backing of the label and affix it securely to your package or use a professional labelling applicator. Make sure it is visible and not covered by any packaging materials.
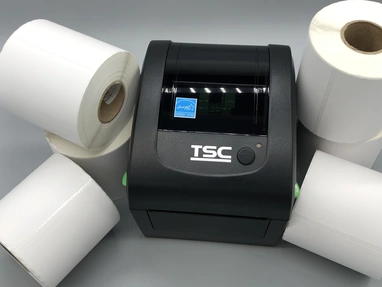
Choosing the Right Shipping Label Printer
To print your own shipping labels, you will need a reliable shipping label printer. Here are some factors to consider when selecting one:
- Compatibility: Ensure that the label maker is compatible with your printer and label stock. Different label makers support different label sizes and formats.
- Ease of use: Look for a label printer that offers a user-friendly interface and intuitive design. This will save you time and frustration when creating and printing shipping labels.
- Printing quality: Check the printing quality and resolution of the label printer. Crisp and clear prints are essential for legibility and professionalism.
- Additional features: Some label printers offer advanced features, such as barcode generation, batch printing, and integration with shipping software. Consider your specific needs and choose a label printer that offers the features you require.
Read more about our shipping & despatch label printers, and label stiock, here:
- Packaging Tape: Printed Packaging Tape,
- Blank Labels: Blank Labels and Stickers on Rolls, Inkjet Printer Labels and A4 Label Sheets, Shop by Size, Avery Number, Austab Number
- Label Printers:Colour Inkjet, Ticket and Barcode Printers by Type
- Custom Labels: Label Printing, Print and Design Custom Food Labels and Stickers
